Record your composition
There are many ways to record your audio visual composition. Three ways are described below:
- recording the visuals and audio with SplitCam
- recording the visuals and audio with Syphon recorder
- recording the visuals with Syphon recorder and audio with Ableton Live
Recording visuals and audio with OBS
In Ableton Live set your Audio Output Device to BlackHole (2 In, 2 Out).

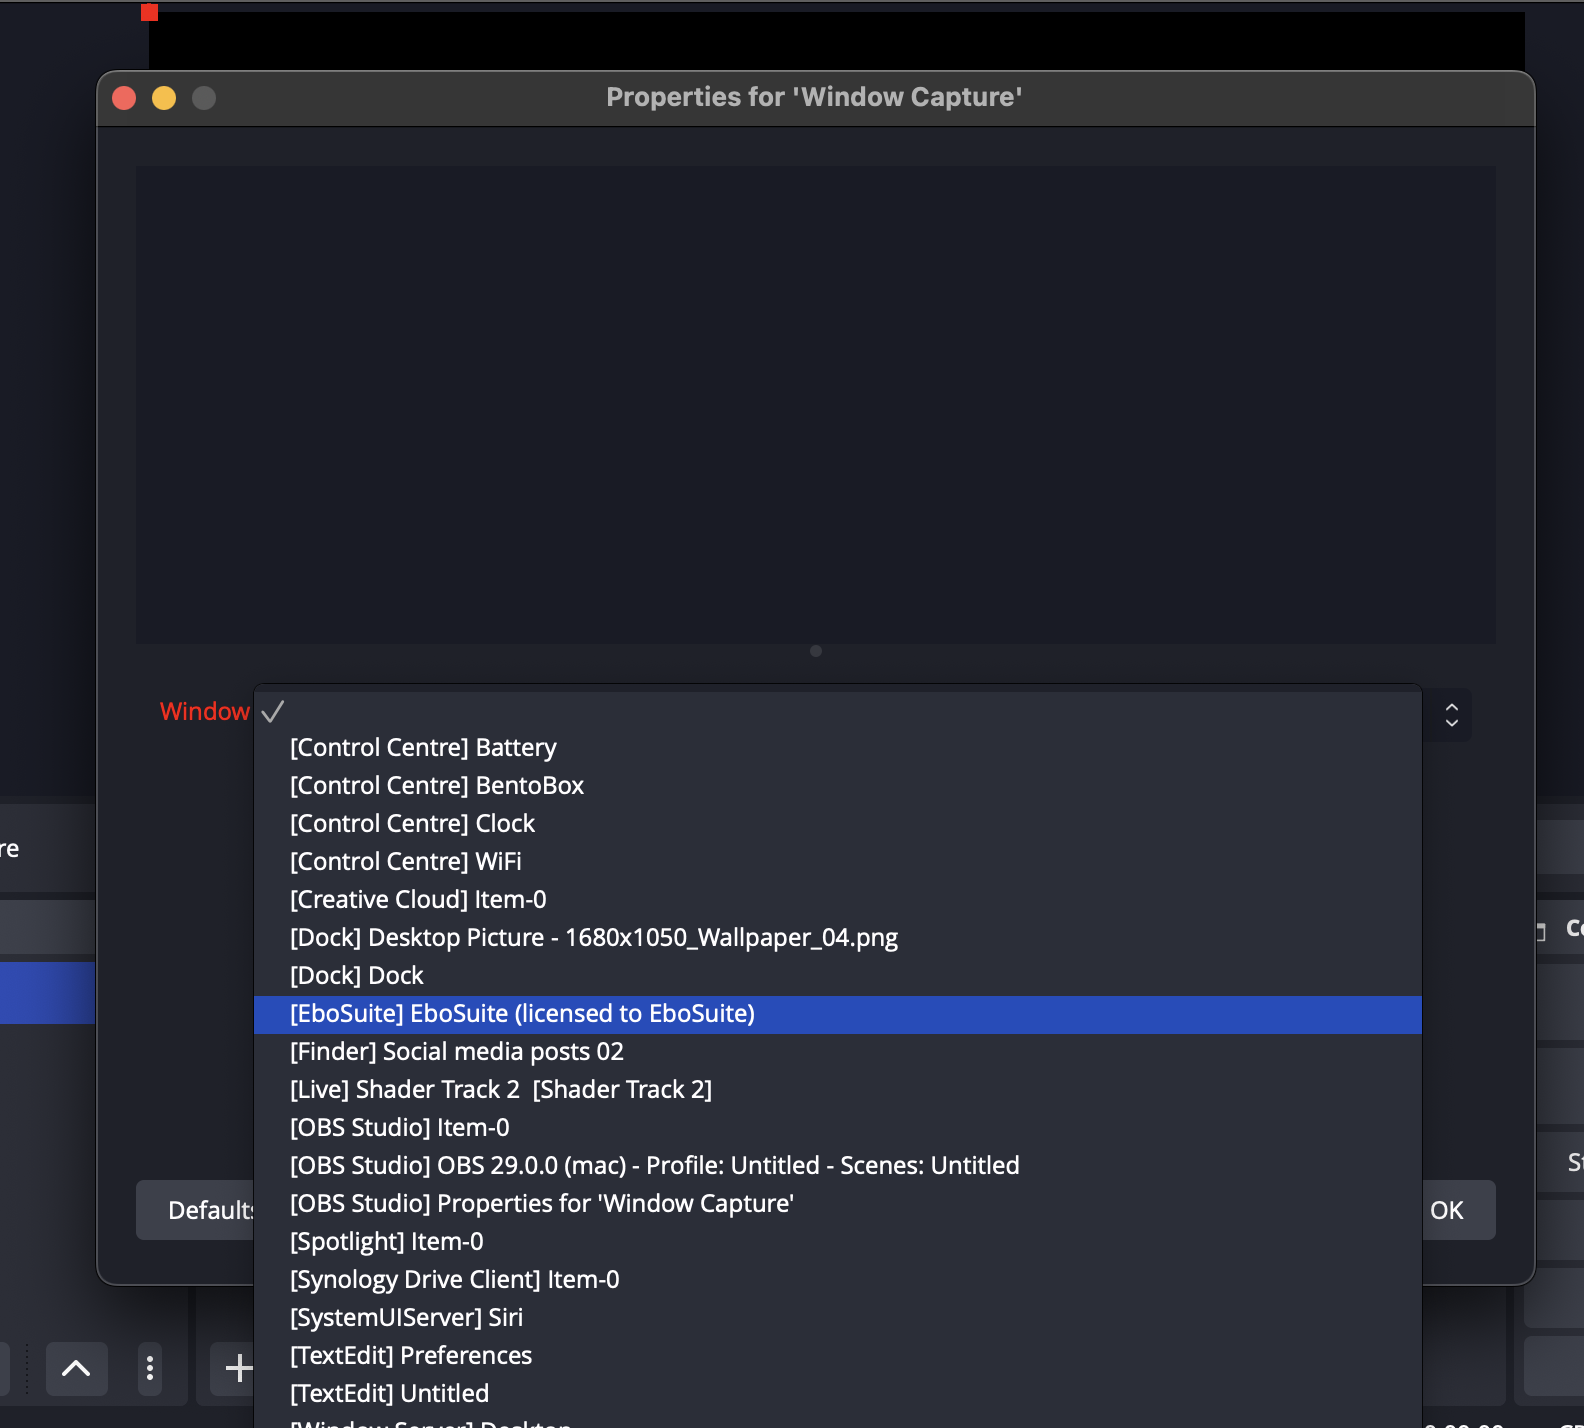
In OBS press the ‘+’ to add a ‘Windows Capture layer’ to your ‘Scene’. Give the window layer a name and press ok. Select the EboSuite output window from the dropdown list, hit ok to confirm your choice. Press ‘+’ again to add an ‘Audio Output Capture layer’ to your ‘Scene’. Give the layer a name and press ok. Select the Blackhole 2ch from the dropdown list, hit ok to confirm. Press the ‘Start Recording’ button to make a recording. Set the folder where the video recordings will be saved in the preferences (‘Output’).


Recording the visuals and audio with Syphon recorder
To record the visuals and audio with Syphon recorder, you’ll need to install the Syphon recorder application and BlackHole (both free).
- Open ‘Audio MIDI Setup’ from the Applications/Utilities folder
- Press ‘+’ and select ‘Multi-Ouput Device’
- Give this Aggregate Device a name (‘EboSuite OUT’, for example)
- In the Audio Device list, enable your preferred audio output source (MacBook Pro Speakers in this case) and BlackHole 2ch
- Turn on Drift Correction for the devices that are not the clock source (BlackHole 2ch)

In Ableton Live set the Audio Output Device to the Multi-Ouput Device. Add an eVideoSend plug-in to the Master Track (or another track with an EboSuite video source) to send the visual output of that track to Syphon Recorder.


In Syphon Recorder select the visual output from EboSuite (called ‘Master – EboSuite’ in this case) from the drop down menu in the main window. Turn on ‘Record Audio’ in the preferences and select BlackHole 2ch as the source.


Recording the visuals with Syphon recorder and audio with Ableton Live
To record the visuals with Syphon recorder and audio with Ableton Live, you’ll need to install the Syphon recorder application (free).
You can record the audio in Ableton Live in two ways:
- as a live performance – record the audio in Ableton Live on an audio track live (learn more about this in the Ableton Live manual)
- render – render the audio of your composition using Ableton Live’s export audio feature (learn more about this in the Ableton Live manual)
To record the visual output of EboSuite, add an eVideoSend plug-in to the Master Track (or another track with an EboSuite video source) to send the visual output of that track to Syphon Recorder.
In Syphon Recorder select the visual output from EboSuite (called ‘Master – EboSuite’ in this case) from the drop down menu in the main window. Note that if you have multiple eVideoSend plug-ins in your Live Set, multiple track names will appear in the drop down menu.

After recording/rendering the audio and visuals, follow the next steps:
- drag the movie file created with Syphon Recorder to an audio track in Ableton Live (this will open Ableton Live’s standard video output window).
- drag the recorded/rendered audio file to an audio track below the movie file in Ableton Live
- sync the audio and movie file by moving the audio file
- export the audio and video tracks to a new movie file using Ableton Live’s export audio/video feature. Learn more about exporting video from Ableton Live using the standard export function in the Ableton Live manual.

Note: you can use any screen capture application (QuickTime Player for example) to record the visual output window of EboSuite. Each application has its pros and cons. A drawback of QuickTime Player, for example, is that it will record in retina if the output window is on a retina screen. This makes the dimensions of the recording twice bigger than the output window. There is no way to turn that off.

